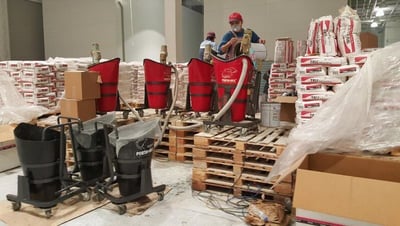
There are several ways to mix self-leveling materials ranging from crude and inefficient manual methods to highly productive methods,
often requiring costly equipment.
But the good news is you don’t have to have costly equipment to get the best result.
You do need suitable equipment, but you also need to use the correct procedure! The mixing method is more important than the machine. Proper equipment is a great help, but if you don’t use the right process, you won’t get the best result. And that isn’t the equipment’s fault!
To provide a consistent appearance and quality, coatings require thorough mixing and fast application to the floor. In today’s cost-conscious market, efficiency is critical to quality results and economic performance.
Does each type of self-leveling compound have a different method?
The short answer is no.
Although different materials may have particular requirements, the basic technique is usually the same for all types of materials.
There are many different types of self-leveling materials in use today. Self-leveling materials range from simple water-based coatings with a blend of with cement and aggregates through to carefully engineered materials, including resin materials of many types.
Whatever the material is you are working with, thorough mixing is necessary to meet the material manufacturer's quality requirements and to provide a coating that meets the expectation of the client. Without this, an unsatisfactory finish and coating failure could result in possibly leading to expensive repairs.

The primary mixing technique for liquid and dry-bag materials.
- Fit the correct size mixing paddle to suit the volume of material to be mixed
- Half-size paddle for up to 40 liters (2 to 3 bags – 20kg each)
- Full-size paddle for up to 80 liters (4 to 5 bags – 20 kg each)
- Select low speed on the motor gearbox
- Add the full quantity of liquids needed for the batch into the canister
- Start to the mixer and add the dry material gradually, about 20 – 30 seconds per bag,
- Before the last bag is added, stop the mixer.
- Scrape around the sides of the canister to clear any unmixed material.
- Select high speed on the motor gearbox. You may need to turn the mixing paddle by hand slightly to allow the gearbox to change speed and the gears to mesh correctly.
- Start the mixer again and add the final bag of material
- When the last bag has been added, stop the mixer to allow air to escape from the mixture.
- You will notice a bubble of air come to the surface. We call this “burping”
- Scrape around the sides of the canister to clear any unmixed material.
- Start the mixer again and leave running for the time recommended by the material manufacturer or until the material is completely missed.
- Turn the motor off
- Release the Tilt lock lever on the cradle and dispense the material.
The basic mixing technique for liquid materials with or without aggregate.
- Fit the correct size mixing paddle to suit the volume of material to be mixed
- Half-size paddle for up to 40 litres (2 to 3 bags – 20kg each)
- Full-size paddle for up to 80 litres (4 to 5 bags – 20 kg each)
- Select low speed on the motor gearbox
- Add the full quantity of liquids needed for the batch into the canister
- Start to the mixer.
- If an aggregate is required, and add the material gradually, about 20 – 30 seconds per bag,
- If no aggregate is required, run the mixer on high speed for the time recommended by the material manufacturer.
- Turn the motor off
- Release the Tilt lock lever on the cradle and dispense the material.
This is a typical and general procedure and some materials may require variations on the typical process.
Always check the instructions for the material you are mixing.
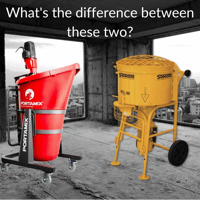
To see the differences in between forced action mixers and vortex mixers, read our article on What's the difference between a forced action mixer and the Mega Hippo

